Upload a File to a Library
Files that exist on your local computer can be uploaded easily into a Teamsite library. As a user you can upload one file or multiple files at a time. Remember that when you upload the file/s to a library you are making a copy and the original file/s still exists on your computer. Once uploaded you should update the more widely shared file/s in SharePoint rather than work on the copy on your computer.
Limits and restrictions
When uploading large files, or many files which combined total a large size, you may get a timeout error or an error due to the maximum permitted filesize in SharePoint (15 Gb). Also beware uploading files or folders with very long path or filenames. SharePoint Online supports up to 400 characters for the total file and path length.
If a library has versioning enabled, SharePoint will automatically upload the file as a new version.
Files that are either empty (0 KB in size) or contain the following characters will not be uploaded to SharePoint: " * : < > ? / \ |
Files can also be uploaded to a library by dragging the file from your computer, onto the library in your web browser. To upload a file/s using the task bar rather than drag and drop, follow these steps:
|
|
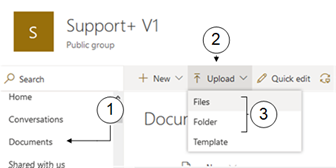
Navigate to the desired library |
|
|
Click Upload |
|
|
If your browser supports folders (e.g. Firefox, Chrome), select Files or Folders from the dropdown menu. You will not get this option in other browsers (e.g. IE11) |
|
|
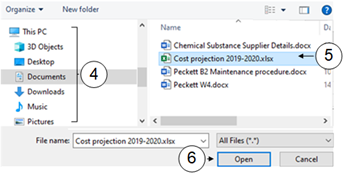
In the File Explorer window navigate to the file you wish to upload |
|
|
Left click to select the file/s (or folder if available). |
|
|
At the bottom of Windows Explorer click on Open if uploading a file or OK if uploading a folder. |
|
|
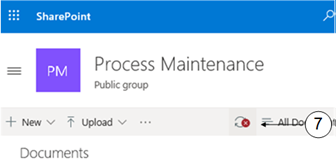
To overwrite existing files with the same name click on the message in the top right of the task bar. |
|
|
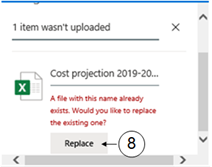
Click Replace in the Progress Pane |